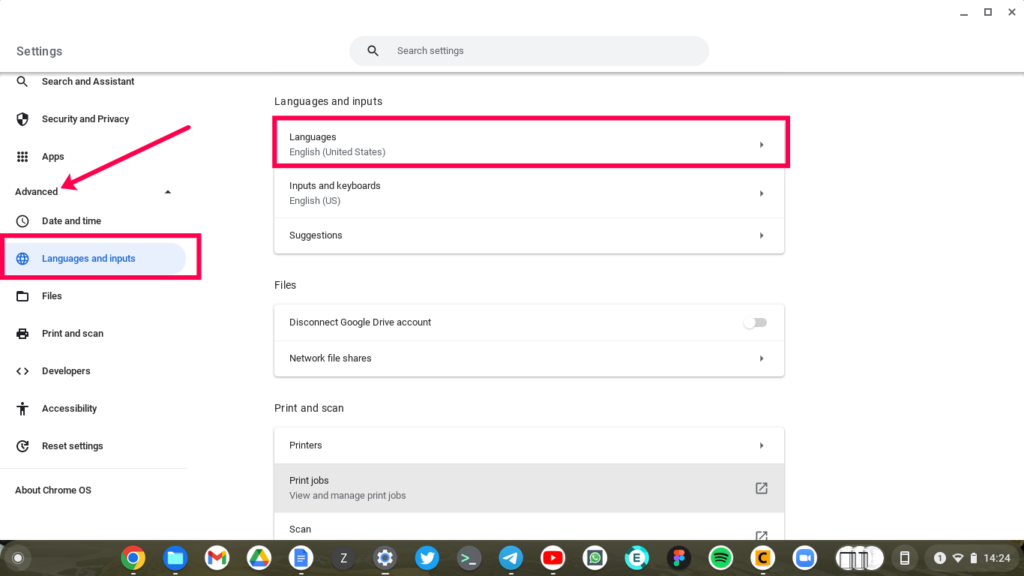
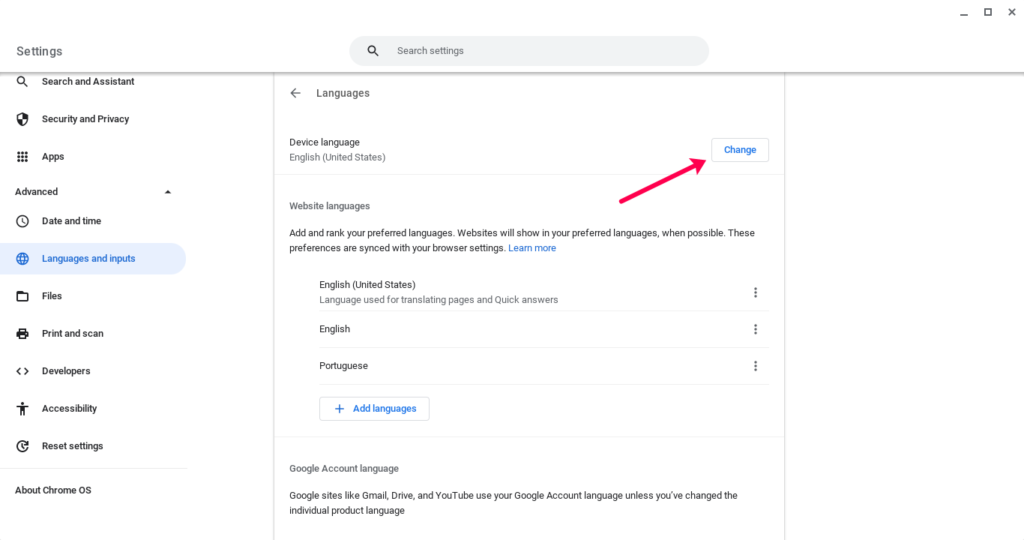
Your preferred language is what Settings and App menu options are based on. Note that this won’t translate web pages or email or whatever you type in your text editor. If you wish to change the web content-language, scroll to the end of this article. For this section, we are changing the device’s language. Changing your preferred language is very easy on Chromebook. Simply go to Settings, then on the left panel, scroll down to Advanced section. Collapse it to reveal Language and inputs options. Click on it, and then click on Languages. You should now be able to see your current device’s language. In my case, it’s English (United States). Click on the Change button on the right to change to a different language pack. Read More:
How to type special characters on your ChromebookHow to Easily Send and Receive Messages on Your Chromebook10 Most Useful Chromebook Keyboard Shortcuts You Should Know
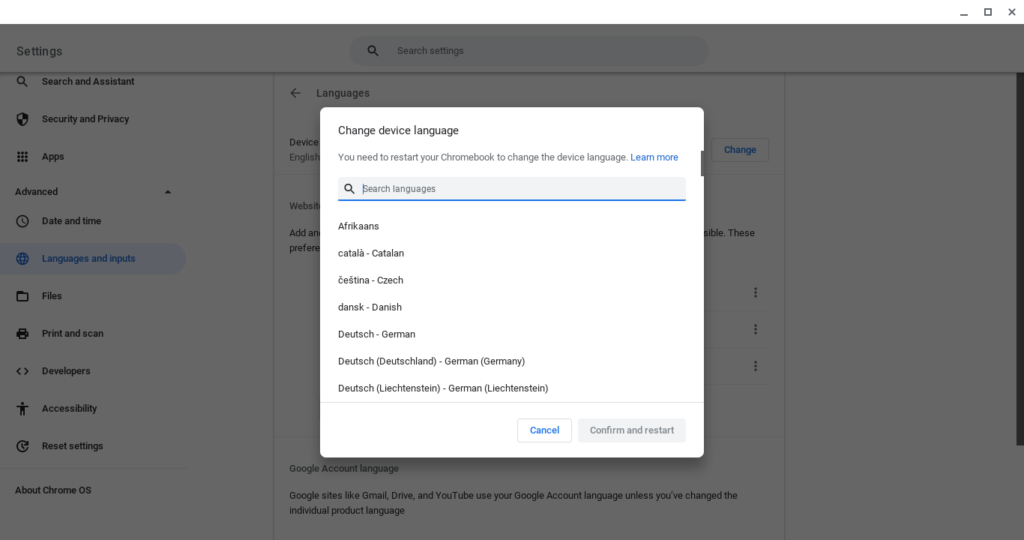
A dropdown selection of supported languages shows up. When you select your preferred language, click on confirm and restart. This will reboot your Chromebook and restart with your new language selection.
Add or remove web content languages
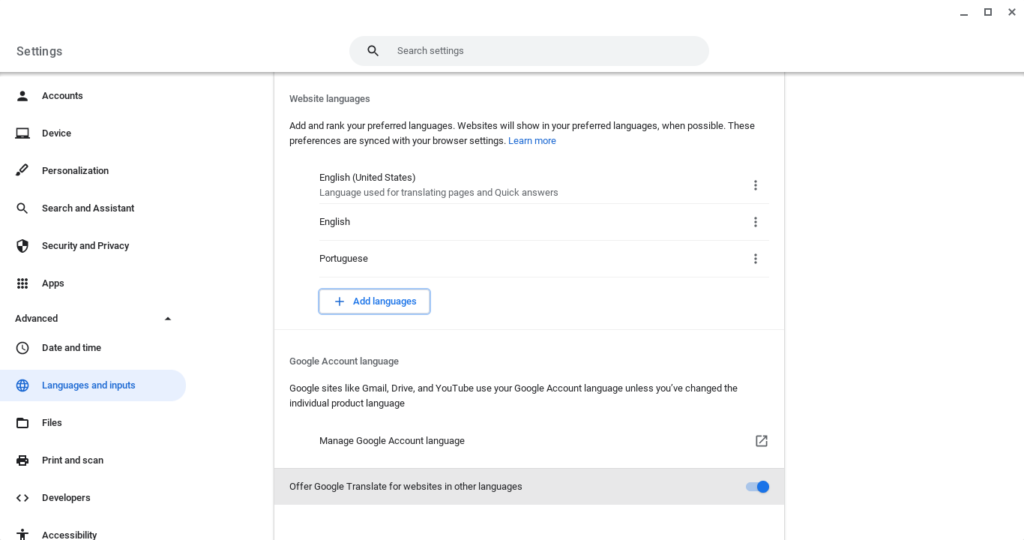
Now that we have changed your device’s preferred language which essentially appears in settings and menus, you can change or add a preferred language for web content when it is available. To do that, go to Settings again > Advanced > Languages, and then under “Web content languages,” select Add languages. A dropdown of supported languages will appear. Select your preferred language and restart your Chromebook. That’s how you can change your Chromebook’s device and web content language.


